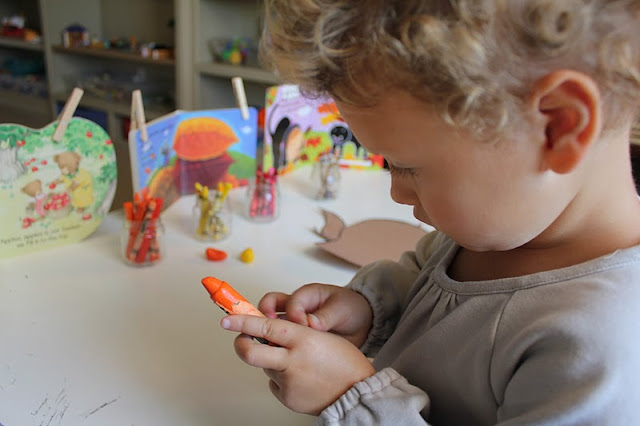
After not touching crayons for at least 6 months my oldest (3 Years) is starting to take an interest in them again. We've been doing a lot of coloring/drawing lately. We've been having tons of fun with our rubbing plate and white board crayons. I thought I would give her a different texture to color on today.
The invitation:
Different printouts relating to some of her favorite books right now.
Crayons (I took out fall colors)
Sandpaper (we used fine paper... which is what works best)
She was excited about this one!
She chose to do an apple. "Does this go on top like this?"
We cut around the apple onto the sandpaper, and I outlined it with black crayon.
First things first... the paper had to come off the big crayons. LOL
She chose to match them with their "right" jar.
She proceeded to grab all the other colors off her shelf and do some more matching with those. "Where are my other colors? I need to get my other crayons."
After 20-30 minutes of just peeling paper and matching she moved onto the apple. "Is this rough? How come it's rough? It feels sandy. Do apples go in the sand?
The coloring begins.
She asked me to help her color. Instead of taking over her project... I cut out another apple and colored along side of her. Mine on left, hers on right. She chose not to color the stem and leaf.
After you are finished... place sandpaper face down on a piece of paper. We used a heavier card stock.
At first I put a towel over because I wasn't sure how the hot iron would take to the sandpaper. I did try it with the iron directly on the sandpaper and it was fine. If you do put a towel over you will want to iron it for at least 30-40 seconds. My daughter did help me with this, but I was too involved to take pictures. Only do what YOU are comfortable with.
Finished prints.
RL
 We've moved. Please click here to view our new blog.


What a brilliant idea! Can't wait to try this out.
ReplyDeleteI love this idea! I will have to keep this in mind for when my little man is big enough.
ReplyDeleteWow! How did you ever think of this??
ReplyDeleteJenna
callherhappy.com
I've seen these projects around and wasn't sure how they would come out! Thanks for demonstrating it!
ReplyDeleteThis is something so simple but so beautiful. I will try it if my daughter does not has the time for it.
ReplyDeletegrandma
@Jenna I have seen coloring on sandpaper before but wanted a better way to display her artwork... rather than just a colored piece of sandpaper. I thought cutting the shapes out would be a fun way to do this. Outlining it in black was my daughter's idea and I don't think we would do it any other way now! I love the way these turned out and we had so much fun in the process! We ended up doing the pumpkins and owl last night. :-) RL
ReplyDeletethis looks so fun! i am going to try this with my toddler
ReplyDeleteI am going to try this with my boy..tqtqtq for the ideas!
ReplyDeleteI loved this idea, but It didn't seem to work out for us. Did you notice a difference between the 2 different grit sandpapers? We had a very rough sandpaper from another project (50 grit), but it didn't transfer much of the crayon at all. I am not sure if I didn't heat long enough or what. It was a 50 grit, and I noticed in your photos you seem to have a 150 and a 220. Did you see a difference between them? Maybe we will try again with a higher number. The kids did enjoy coloring on the surface. Thanks again!
ReplyDeleteYes, there was a difference between the two. The 220 worked better. We haven't used anything higher than that, but because of our results I am assuming the finer the paper the better the result. RL
ReplyDeleteThese look like fun. I love Sarah's question about sandpaper. I didn't realize there was a difference. I am going to pin this to my Apple board.
ReplyDelete