Showing posts sorted by relevance for query sensory board. Sort by date Show all posts

Wednesday, June 8, 2011

Homemade sensory board - I think it, Daddy builds it.

Having taught children with autism for 11 years, I knew there were great benefits to sensory integration.  I think when I had my son, I immediately started collecting things to put on a sensory board for him - LOL.  I wanted to include light, noise, and tactile items to stimulate the senses.  Several items are affixed with Gorilla Glue (super strong) and other larger items are affixed with screws or brackets.  He loved this board and I knew I was helping him learn about his world through his senses.  My husband purchased a board from Home Depot - any board will do. 

The pictures are not great because we built this board before Play at Home Mom LLC was even a twinkle in my eye.  LOL

Rattling the chain against the wood

TACTILE SQUARES


There are so many items you can include on a sensory board - and you can really cater it to the needs/age/interests of your child.  My son was only 6 months old when we built his, and I purchased a lot of items from the Dollar Tree, so we kept it pretty simple.  Latches, locks, and other fasteners are good options for older children.

- AK (MESE, MECD)


RL's Play space

Playroom for a 3 year old, 2 year old, and 3 month old 

To see how this playroom started off click HERE


Black section of wall is chalk board paint purchased from home depot.  Artwork is hung in clear box cases found at Michaels Craft Store.  Mirrors behind art supplies were also purchased at Michaels Craft store in a pack of six.  The shelves the art supplies are on I made myself.  Bought a long narrow board from home depot, painted it, and secured it to the wall with T brackets.  The blue table you see with the red and green chair (there are four chairs to this set) was purchased at Big Lot's for $40.00.  


Close up of art supplies

For an inside view of the art space click HERE

Most of the art supplies on the top shelf are stored in baby food jars.  The string is stored in a sugar dispenser from the dollar store, and a few of the other clear plastic cups were purchased at Walmart.


The art supplies on the bottle shelf are all stored in clear containers that I purchased at Dollar Tree.  Some of the stuff that is in the containers... bottle caps, ribbon, chalk, styrofoam balls, wikki sticks, cotton balls, little shells, googly eyes, crayons, pony beads, wood shapes, buttons, colored pasta, pom poms, clothes pins, etc.  


This whole storage system was purchased at Target.  You can buy how ever many cubes you want and they give you a TON of options on what to put in each cube... shelves, buckets, bins, doors, etc.  They also come in many different colors.  Love this system.  


Magnetic white board.  Shoe organizer underneath cut into strips and hung with staples.  The "table" the lamp is on was also purchased at target.


Magnetic felt board can be seen on our AMAZON STORE... CLICK HERE

BELOW

Reading area plus swing attachments


 TOYS


Close up..


Light table/creativity.

The table the light panel is on I built myself.  I got a piece of wood from home depot, had the saw guy cut the legs and top to the dimensions I wanted and then screwed it all together.


Magna tiles, wedgits, random plastic containers for "baking cookies"/sorting, etc.  All the toys on the bottom can be found in our products we love section under supplies.


Natural materials... sand, acorns, bark, shells, sticks, rocks   The container with the blue top was purchased at dollar tree.  The container the bark is in was purchased at Michaels Craft Store.  The wood boxes at the bottom holding sticks, rocks, and shells were boxes that some of our toys and puzzles came in.


Light table accessories and puzzles (in baskets)  
Containers on the top were all purchased at Dollar Tree.  They contain colored epsom salt and colored rice.  The rest of the containers are empty food jars.  They contain jems, marbles, moon rocks, mosaic tiles, acrylic letters, dollar store shot glasses, and insect blocks.  The baskets underneath are filled with different puzzles.  Baskets were purchased at Dollar Tree.  


Close up... colored epsom salt, colored rice, marbles, translucent cups, gems, tiles, etc.

OUR OUTDOOR ENVIRONMENT

Everything you see here was purchased at Discount School Supply and can be found here.  


Close up of art table


Sensory table equipment, bubbles, balloons, chalk, etc.


Close up

Shelving, spray bottles, ketchup bottles, balloons, bubbles, and clear containers were all purchased at Walmart.  All the measuring cups, cupcake tins, turkey baster, spoons, funnels, etc. were purchased a the dollar store.  


Art supplies..... play-doh, foam paint, sand, glue, watercolors, salad spinner, etc.  (all accessible to children)


Sensory bins

Some changes that have been made since first post.


Paper, scissors, and paint are displayed now


New kitchen area/ peg board 


Close up of Peg Board

Top from left to right:  whiteboard markers, whiteboard crayons, touch and feel cards, magnetic letters/numbers.  Both the touch and feel cards and magnetic letters and numbers can be seen on our Amazon store.  


Middle buckets are all felt board stories:  If You Give a Moose a Muffin, The Napping House, The Very Hungry Caterpillar, Mouse Paint, and 5 Monkeys Sitting in a Tree.

Bottom two buckets are Magnetic foam letters/shapes that can be seen here....   Discount School Supply

Bottom right are just random felt board animals.  


New playmobil station

2012


Added more lights and kept top shelf to just writing/painting/drawing materials


Re-organized cubies


Painted over blackboard wall and added peg board.  


Organized Sensory shelves.  Brought in our art table from outside.  


Close up of sensory materials and puzzles


Nature Area... we added tree blocks


Playmobil area got a uplift as well.  Added another shelf for furniture and also added lighting.  


Removed white couch.  


Added light table


Took down felt accessories from peg board and made room for light materials.


Created boxes for felt stories and books.  


Saturday, June 11, 2011

Our Environment - AK

HOW IT ALL STARTED....

I always knew I wanted to create a great space for my son and teach him to navigate it safely, just as I did with my students when I was a Reggio teacher.  When we moved to NC, I was ecstatic to have an extra room dedicated to play and learning.  His playroom has really evolved and continues to as his needs and interests change.  Here is how it all began, the changes made, and where we are today.  Hope you enjoy!

In the beginning we had his play room set up in the smallest room in the house...

PLAY ROOM 2010


Just getting started


Then we added some cubby shelves.  This was how I first organized his materials.  Notice our light panel tucked nicely to the side of the shelves....a "space" for it had yet to evolve.


 magnet board


 Materials on top of book shelf...reading nook on the other side with felt board and felt board accessories


I would hang a white sheet on the wall for play with the overhead projector


 This was the set up in the smaller room....play room 2010


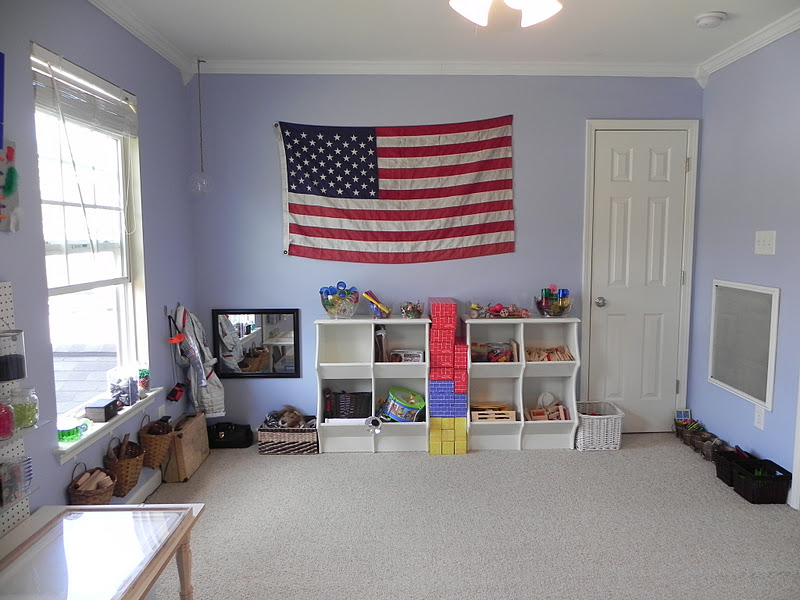
We soon decided that since his bed room was only used for sleep, that it would make sense to move his play room into the bigger room and have his bedroom in the smaller one.

PLAY ROOM 2011


I took a lot of inspiration for my playroom and all of its accessories from being a teacher in a Reggio inspired school for 3 of my 14 years of teaching - my classroom looked a lot like this.  The whole philosophy behind the environment is to make the space inspiring - a place where a child will enter and WANT to explore.  Its also about having all materials (typically from the natural environment or recycled items) readily accessible to the child.  The walls and furniture are usually neutral (hence my tan walls) to encourage the focus on the beauty of the creations and materials in the room.  Most of these materials are used in all kinds of child-guided imaginative play.  There are no "rules" (as long as nothing is getting ruined) and messes are embraced as learning experiences.  That being said, my son does appreciate the order.  Believe it or not, we have many days where we dont even go into this room - but when we do, oh the places we go!!
ENJOY!

-AK
(MESE, MECD)


Just coming together


Another one where we were just getting started...art corner, light table area coming together, etc


 Still pulling together all the loose ends


Play room NOW (November 2011)


This is a view of the play room from the entryway.  The white thing hanging is a shower curtain liner that we use for the overhead projector.  Its removable, so its not always hanging there.


How it looks today
(I put a water proof blanket under the art table to protect the floor....its not a rug.)


These baskets are actually planters (I found them at the dollar store).  They are full of various items - wood pieces, sticks, pine cones, acorns, etc. 


These are my 2 year old son's toys.  Most of them are toys you build with, such as Tinker Toys, Citiblocs, Blocks, Snap Blocks, etc


This is a magnet board built by my husband - framed sheet metal.  I LOVE this piece.  I used a shoe organizer from target to organize all of the items that are magnetic - as well as two baskets.   


This area is for dress up/imaginary play (its a work in progress).  A mirror, two puppets, and a basket full of animal masks.


This is a felt board I made.  I just bought a piece of felt and one of the thick poster board sheets, used some spray adhesive and a hot glue gun, and wrapped it.  Again, you see the shoe organizer to organize felt board accessories.


 Light table area


close-up of light table accessories


Peg board mounted on the back of the book shelf with materials on acrylic shelves and in acrylic cups


 This is on top of he book shelf.  Mirror, rocks, agate slices, paint tray, play doh tray, CD player


 The art corner has changed recently.  I have known I wanted to change it for some time now...probably a YEAR!  I wanted something where my son could physically take a container to the table with him, instead of pulling materials out of a pocket.  Just as a reminder, this is what it was BEFORE...

 
BEFORE

 The only new items are the paint cans and hooks that hold the scissors


OUR OUTDOOR SPACE

 Easel THEN

 Easel NOW


 Smaller Sensory table THEN


Taller sensory table NOW


These are our outdoor supplies.  I had to put them in something that closes because we have strong winds here...but he has full access to the materials.


This is our swing.  It was initially in the playroom but the swinging range is greater in the garage (more fun).  We wanted it to be inside because of the extreme hot and cold temperatures here. We have several attachments to this.  We have the swing you see here, a trapeze bar, a regular swing, a climbing rope, and a sensory swing that Daddy built.


DIY See Saw


PLAYROOM 2012

My playroom is always changing as my son grows, his interests change, and I notice that things would be more functional set up another way.  Its 2012 and our playroom just got a paint makeover.  I'm also making a few changes here and there.  This is what we have so far, but stay tuned.

I added a curtain rod in the art area and used shower curtain hook to hang buckets full of materials.  I moved the paper holder over and put the scissors just above it.

New refreshing blue paint color.


I expanded the "dramatic play" area a bit.  It now has his Dr kit, his "suitcase", his astronaut costume, and basket of masks/puppets.

I took down the clear shoe organizer strip and bought small pails from Michaels for his magnets.  Being able to dump out the pieces makes it easier for him to find what he is looking for.

I took down the felt board and added shelves for his Playmobil.  I find that he plays with it more when its out like this....and the felt board wasn't getting much use anymore (though its still in the closet and he brings it out from time to time).

I expanded the mirrors across the entire back wall.  LOVE!

close up of paint cans in art area


2012 PLAYROOM

I have made a few changes to the art area.  My son is really into building and figuring out how things work, so Im trying to make his art corner more inviting to him.

Wood pieces, plastic pieces, screws, nails, drill, screw driver, hammer.


- AK 
(MESE, MECD)